oauth2-实现单点登录(一)最简示例
参考教程:https://my.oschina.net/wotrd/blog/3056409
本示例实现最简配置下的实现单点,排除其他干扰
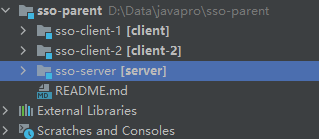
项目结构
一、认证服务端sso-server
创建springcloud项目
1.导入关键的依赖
org.springframework.cloud spring-cloud-starter-oauth2 完整依赖pom见:pom.xml
2.配置认证服务
创建AuthConfig,继承AuthorizationServerConfigurerAdapter
redirectUris的配置,要和外部请求的重定向地址一致,不然出错
// 开启认证服务
 @Configuration
 @EnableAuthorizationServer
 public class AuthConfig extends AuthorizationServerConfigurerAdapter {/*** 配置密码加密, springboot2.x需要配置* @return*/@Beanpublic BCryptPasswordEncoder passwordEncoder() {return new BCryptPasswordEncoder();}@Overridepublic void configure(ClientDetailsServiceConfigurer clients) throws Exception {clients.inMemory().withClient("client") //客户端client_id.secret(passwordEncoder().encode("secret")) // 客户端 secret.authorizedGrantTypes("authorization_code") // 授权类型, 授权码.scopes("app") // 范围.redirectUris("https://www.hao123.com/"); // 重定向地址 登录地址}/*** 放开token和checkToken 拦截* @param oauthServer*/@Overridepublic void configure(AuthorizationServerSecurityConfigurer oauthServer) {oauthServer.tokenKeyAccess("permitAll()").checkTokenAccess("permitAll()").allowFormAuthenticationForClients();}
 }
创建WebSecurityConfig,继承WebSecurityConfigurerAdapter
创建两个测试账号
import org.springframework.beans.factory.annotation.Autowired;
 import org.springframework.context.annotation.Configuration;
 import org.springframework.security.config.annotation.authentication.builders.AuthenticationManagerBuilder;
 import org.springframework.security.config.annotation.method.configuration.EnableGlobalMethodSecurity;
 import org.springframework.security.config.annotation.web.configuration.EnableWebSecurity;
 import org.springframework.security.config.annotation.web.configuration.WebSecurityConfigurerAdapter;
 import org.springframework.security.crypto.bcrypt.BCryptPasswordEncoder;@Configuration
 @EnableWebSecurity
 @EnableGlobalMethodSecurity(prePostEnabled = true, securedEnabled = true, jsr250Enabled = true)
 public class WebSecurityConfig extends WebSecurityConfigurerAdapter {@AutowiredBCryptPasswordEncoder passwordEncoder;@Overrideprotected void configure(AuthenticationManagerBuilder auth) throws Exception {auth.inMemoryAuthentication().withUser("admin").password(passwordEncoder.encode("123456")).roles("ADMIN").and().withUser("user").password(passwordEncoder.encode("123456")).roles("USER");}
 }
3.项目结构

4.测试
4.1登录
启动项目后,浏览器访问:
http://localhost:9000/oauth/authorize?client_id=client&response_type=code
输入admin 123456
4.2授权
选择 Approve

4.3获取授权码code

4.4获取token
postman请求获取token,(code仅首次有效)

4.5校验token

二、客户端client-1
创建springcloud项目
1.导入关键的依赖
org.springframework.boot spring-boot-starter-thymeleaf org.springframework.cloud spring-cloud-starter-oauth2 完整依赖pom见:pom.xml
2.调整启动类
启动类加入@EnableOAuth2Sso注解,标识本项目为客户端
3.配置属性
在application.properties加入配置
# 应用名称
 spring.application.name=sso-client-1
 # 应用服务 WEB 访问端口
 server.port=9005# 登录路径
 security.oauth2.sso.login-path=/index
 #资源客户端配置
 security.oauth2.client.client-id=client
 security.oauth2.client.client-secret=secret
 security.oauth2.resource.id=resource
 #认证端需要授权路径
 security.oauth2.resource.token-info-uri=http://localhost:9000/oauth/check_token
 #请求认证地址
 security.oauth2.client.user-authorization-uri=http://localhost:9000/oauth/authorize
 #获取token地址
 security.oauth2.client.access-token-uri=http://localhost:9000/oauth/token
 #reresh_token验证周期
 security.oauth2.client.refresh-token-validity-seconds=10
 #禁止同名sessionid,是个坑,不加会报错
 server.servlet.session.cookie.name=OAUTH2_SESSION
4.配置ResourceServerConfig
ResourceServerConfig,继承ResourceServerConfigurerAdapter,放开一些拦截;
import org.springframework.context.annotation.Configuration;
 import org.springframework.security.config.annotation.web.builders.HttpSecurity;
 import org.springframework.security.oauth2.config.annotation.web.configuration.ResourceServerConfigurerAdapter;@Configuration
 public class ResourceServerConfig extends ResourceServerConfigurerAdapter {/*** security的鉴权排除的url列表*/private static final String[] EXCLUDED_AUTH_PAGES = {"/actuator/**", "/oauth/**", "/css/**", "/js/**", "/images/**", "/webjars/**","**/favicon.ico", "/index", "/*.html", "/**/*.html", "/**/*.css", "/**/*.js"};/*** 配置资源服务器,限制路径* @param http* @throws Exception*/@Overridepublic void configure(HttpSecurity http) throws Exception {http.authorizeRequests().antMatchers(EXCLUDED_AUTH_PAGES).permitAll().anyRequest().authenticated();}
 }
5.创建欢迎页
templates下创建index.html
 Title


 welcome to sso client!
6. 调整认证服务端
- AuthConfig下的redirectUris重定向地址调整为"http://localhost:9005/index"
7.测试
1.访问客户端:http://localhost:9005
可以看到,会重定向到服务端的登录页
 输入admin 123456 登录后,会跳转到客户端的http://localhost:9005/index,欢迎页

三、客户端client-2
1.创建客户端
- 大致重复上面客户端client-1的步骤(或复制clinent-1)。
- 修改端口为9006
2.调整服务端
AuthConfig下的redirectUris重定向地址加入为"http://localhost:9006/index"

四、总结
- 单点实现,在于两个客户端都使用同一个client-id;
- 服务端需要为每一个客户端,配置重定向地址;
- 客户端配置login-path,服务端重定向地址必须加上:http://{client.ip:端口}/{client.login-path};
代码见f_01_basics分支:f_01_basics
END
下一章见:oauth2-实现单点登录(二)数据持久化
标签:
相关文章
-
无相关信息