Springboot框架02
目录
1.springboot自动装配原理
2. springboot整合数据源--连接数据库
2.1设置默认数据源
2.2设置Druid数据源
3.springboot整合mybatis框架
4. springboot整合pageHelper分页插件
5. 综合案例
6. springboot整合定时器
1.springboot自动装配原理
springboot 有没有注册DispatcherServlet. 为何能找到controller层。
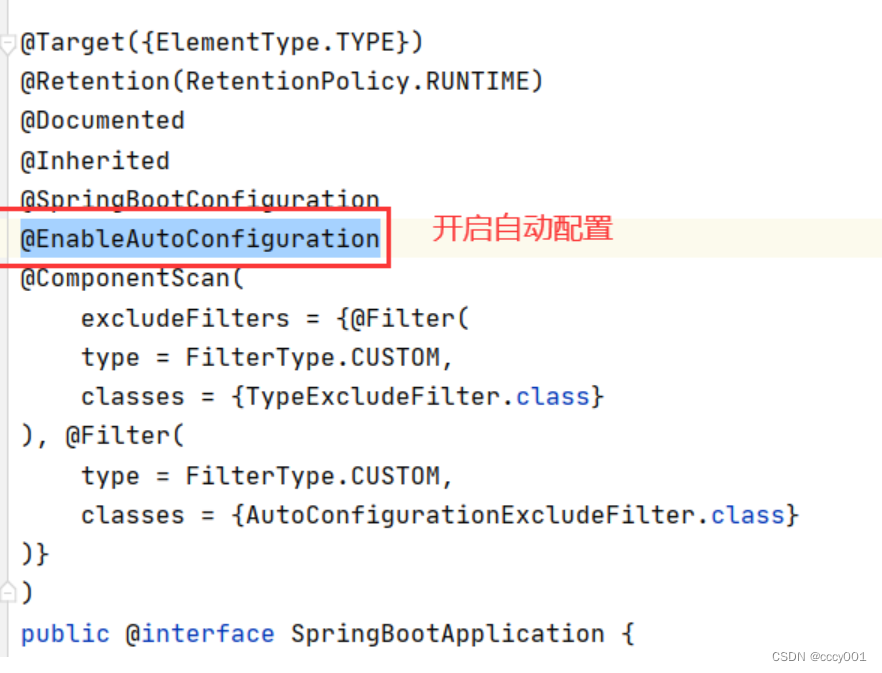
原理:当主函数运行时会加载一个使用@SpringBootApplication注释的类,@SpringbootApplication它是一个复合组件。其中@EnableAutoConfiguration它是开启自动配置的核心注解,该注解也是一个复合组件,其中间@Import({AutoConfigurationImportSelector.class}) ,该注解需要导入一个AutoConfigurationImportSelector类,该类会加载你需要的自动装配类,而这些自动装配类会完成响应的自动装配功能。
Springboot完成自动装配


2. springboot整合数据源--连接数据库
2.1设置默认数据源
①引入相关依赖
springboot自动配置会加载jdbc的自动配置类---读取springboot配置文件中数据源的信息,从而完成数据源的自动配置。
org.springframework.boot spring-boot-starter-jdbc mysql mysql-connector-java ②在application配置文件中配置数据源
#数据源信息
 spring.datasource.driver-class-name=com.mysql.cj.jdbc.Driver
 spring.datasource.username=root
 spring.datasource.password=123456
 # characterEncoding=UTF8 防止添加的数据出现乱码
 spring.datasource.url=jdbc:mysql://localhost:3306/mybatis?serverTimezone=Asia/Shanghai&characterEncoding=UTF8
③测试
@SpringBootTest
 class Qy168Springboot03ApplicationTests {@Autowired//Springboot帮助完成数据源的自动装配private DataSource dataSource;@Testvoid contextLoads() throws SQLException {System.out.println(dataSource.getConnection());}
 }
2.2设置Druid数据源
①引入druid数据源的依赖
com.alibaba druid-spring-boot-starter 1.2.1 ②修改application配置文件
spring.datasource.druid.driver-class-name=com.mysql.cj.jdbc.Driver
 spring.datasource.druid.username=root
 spring.datasource.druid.password=123456
 spring.datasource.url=jdbc:mysql://localhost:3306/mybatis?serverTimezone=Asia/Shanghai
 #初始化的连接对象的个数
 spring.datasource.druid.initial-size=5
 #最多的连接个数
 spring.datasource.druid.max-active=10
③测试
@SpringBootTest
 class Qy168Springboot03ApplicationTests {@Autowired//Springboot帮助完成数据源的自动装配private DataSource dataSource;@Testvoid contextLoads() throws SQLException {System.out.println(dataSource);}
 }
3.springboot整合mybatis框架
(1)spring框架需要配置SqlSesssionFactoryBean对象,还要配置DAO接口的代理实现类。
(2)springboot会自动配置SqlSesssionFactoryBean对象,但是必须引入starter依赖。
① 引入mybatis和springboot整合依赖
org.mybatis.spring.boot mybatis-spring-boot-starter 2.1.0 ②创建实体类
@Data
 public class User {private Integer id;private String username;private String password;private String name;private Double balance;
 }
③创建dao接口
public interface UserDao {public List selectAll();
 }
④创建mapper映射文件
⑤修改application配置文件中的内容
##数据源信息
 #spring.datasource.driver-class-name=com.mysql.cj.jdbc.Driver
 #spring.datasource.username=root
 #spring.datasource.password=123456
 ## characterEncoding=UTF8 防止添加的数据出现乱码
 #spring.datasource.url=jdbc:mysql://localhost:3306/mybatis?serverTimezone=Asia/Shanghai&characterEncoding=UTF8spring.datasource.druid.driver-class-name=com.mysql.cj.jdbc.Driver
 spring.datasource.druid.username=root
 spring.datasource.druid.password=123456
 spring.datasource.url=jdbc:mysql://localhost:3306/mybatis?serverTimezone=Asia/Shanghai
 #初始化的连接对象的个数
 spring.datasource.druid.initial-size=5
 #最多的连接个数
 spring.datasource.druid.max-active=10#指定mybatis映射文件的路径,classpath编译后的路径
 mybatis.mapper-locations=classpath:mapper/*.xml
 #控制台打印sql日志
 mybatis.configuration.log-impl=org.apache.ibatis.logging.stdout.StdOutImpl
⑥在主启动类上添加dao接口的扫描配置
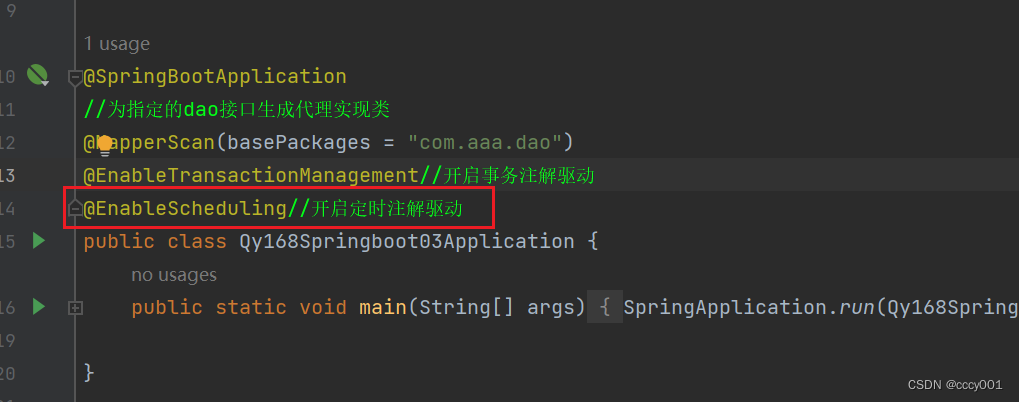
@SpringBootApplication
 //为指定的dao接口生成代理实现类
 @MapperScan(basePackages = "com.aaa.dao")
 public class Qy168Springboot03Application {public static void main(String[] args) {SpringApplication.run(Qy168Springboot03Application.class, args);}
 }
⑦测试
@SpringBootTest
 class Qy168Springboot03ApplicationTests {@Autowired//Springboot帮助完成数据源的自动装配private DataSource dataSource;@Testvoid contextLoads() throws SQLException {System.out.println(dataSource);}@Autowiredprivate UserDao userDao;@Testpublic void testSelectAll(){List users = userDao.selectAll();for (User user : users) {System.out.println(user);}}
 }
4. springboot整合pageHelper分页插件
①添加pageHelper依赖
com.github.pagehelper pagehelper-spring-boot-starter 1.4.6 ②测试
@Testpublic void testSelectAllpage(){PageHelper.startPage(1,5);List users = userDao.selectAll();//把结果封装到PageInfo中PageInfo userPageInfo = new PageInfo<>(users);System.out.println("总条数:"+userPageInfo.getTotal());System.out.println("总页数:"+userPageInfo.getPages());System.out.println("当前页的记录:"+userPageInfo.getList());} 5. 综合案例
springboot+mybatis+druid+pageHelper整合
①创建springboot工程 ,添加依赖
org.springframework.boot spring-boot-starter-web org.mybatis.spring.boot mybatis-spring-boot-starter 2.3.1 mysql mysql-connector-java org.projectlombok lombok true com.alibaba druid-spring-boot-starter 1.2.1 org.springframework.boot spring-boot-starter-test test org.mybatis.spring.boot mybatis-spring-boot-starter-test 2.3.1 test ②修改application配置文件
#数据源信息
 spring.datasource.druid.driver-class-name=com.mysql.cj.jdbc.Driver
 spring.datasource.druid.username=root
 spring.datasource.druid.password=123456
 spring.datasource.url=jdbc:mysql://localhost:3306/mybatis?serverTimezone=Asia/Shanghai
 #初始化的连接对象的个数
 spring.datasource.druid.initial-size=5
 #最多的连接个数
 spring.datasource.druid.max-active=10#指定mybatis映射文件的路径,classpath编译后的路径
 mybatis.mapper-locations=classpath:mapper/*.xml
 #控制台打印sql日志
 mybatis.configuration.log-impl=org.apache.ibatis.logging.stdout.StdOutImpl
③创建实体类
表tbl_emp
@Data
 public class Emp {private Integer id;private String name;@DateTimeFormatprivate Date birthday;private String headImg;private Integer deptId;private Double salary;private Dept dept;
 }
表tbl_dept
@Data
 public class Dept {private Integer id;private String dname;private String loc;}
④ 创建dao接口和mapper映射文件
public interface EmpDao {//增public int insert(Emp emp);//删public int deleteById(Integer id);//改public int update(Emp emp);//根据id查询public Emp selectById(Integer id);//查询全部public List selectAll();
 }
insert into tbl_emp values(null,#{name},#{birthday},#{headImg},#{deptId},#{salary}) update tbl_emp set name=#{name},birthday=#{birthday},headImg=#{headImg},dept_Id=#{deptId},salary=#{salary} where id=#{id} delete from tbl_emp where id=#{id} id,name,salary,birthday,dept_id deptId,headImg ⑤创建service业务层
public interface EmpService {public Result insert(Emp emp);public Result deleteById(Integer id);public Result update(Emp emp);public Result selectById(Integer id);public Result selectAll(Integer current,Integer pageSize);
 }
@Service
public class EmpServiceImpl implements EmpService {@Autowiredprivate EmpDao empDao;@Overridepublic Result insert(Emp emp) {int insert = empDao.insert(emp);return insert>0?new Result(200,"添加成功",null):new Result(500,"添加失败",null);}@Overridepublic Result deleteById(Integer id) {int i = empDao.deleteById(id);return i>0?new Result(200,"删除成功",null):new Result(500,"删除失败",null);}@Overridepublic Result update(Emp emp) {int update = empDao.update(emp);return update>0?new Result(200,"修改成功",null):new Result(500,"修改失败",null);}@Overridepublic Result selectById(Integer id) {Emp emp = empDao.selectById(id);if (emp!=null){return new Result(200,"根据id查询成功",emp);}return new Result(500,"查询失败",null);}@Overridepublic Result selectAll(Integer current, Integer pageSize) {PageHelper.startPage(1,3);List emps = empDao.selectAll();PageInfo pageInfo = new PageInfo<>(emps);return new Result(200,"查询成功",pageInfo);}
} ⑥ controller接口层
@RestController
@RequestMapping("/emp")
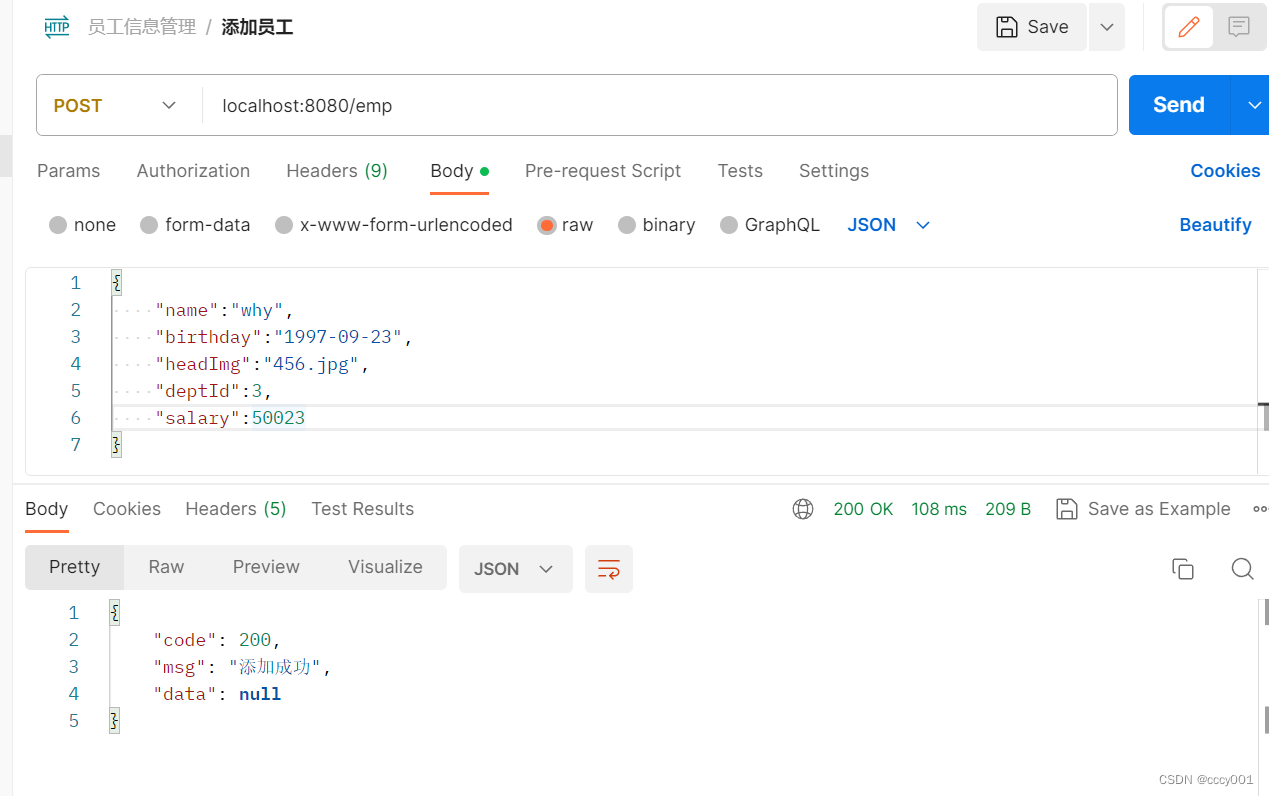
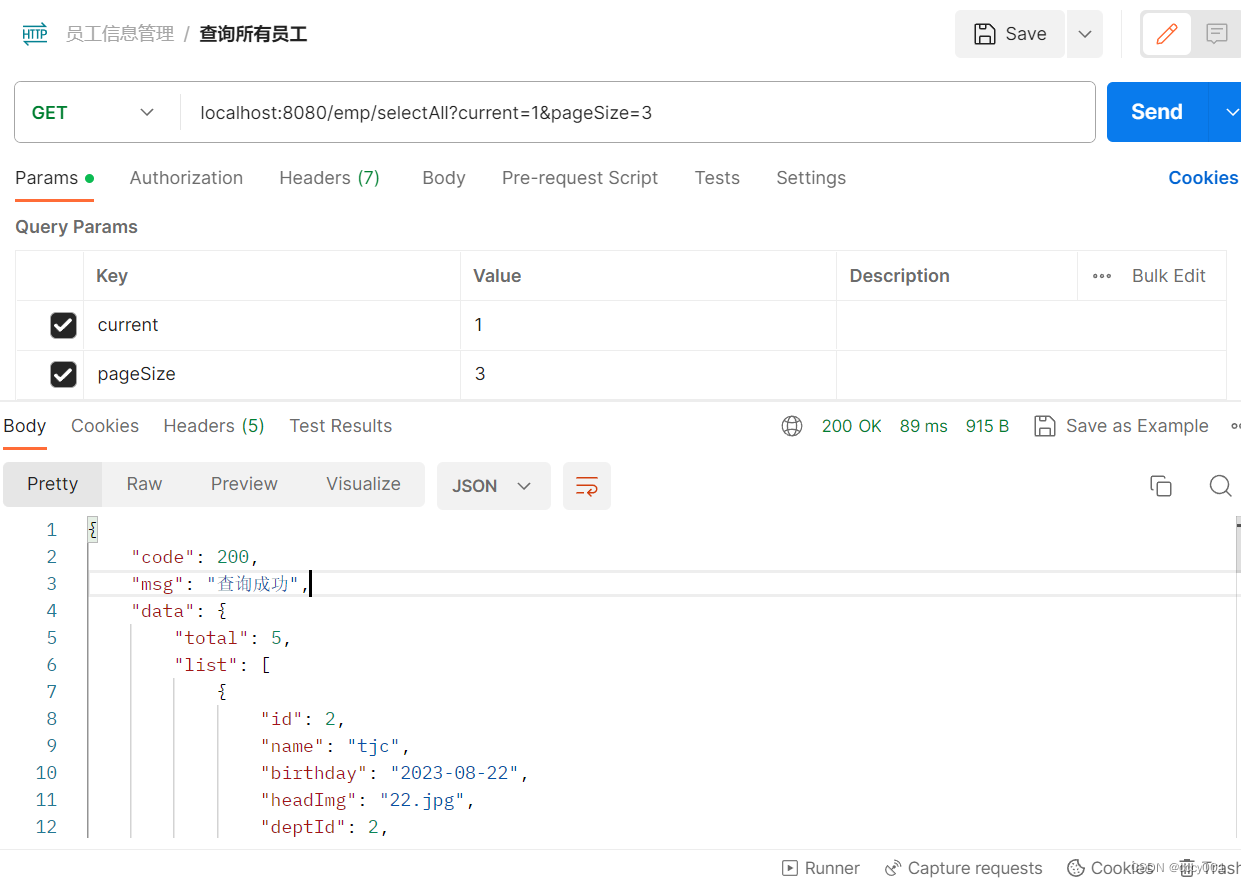
public class EmpController {@Autowiredprivate EmpService empService;@DeleteMappingpublic Result deleteById(Integer id){Result result = empService.deleteById(id);return result;}@PutMappingpublic Result update(@RequestBody Emp emp){return empService.update(emp);}@PostMappingpublic Result insert(@RequestBody Emp emp){return empService.insert(emp);}@GetMappingpublic Result selectById(Integer id){return empService.selectById(id);}@GetMapping("/selectAll")public Result selectAll(Integer current, Integer pageSize){return empService.selectAll(current,pageSize);}
}⑦postman测试


6. springboot整合定时器
定时器:在规定时间内,或规定的时间点执行相应的代码
①引入定时器依赖
org.springframework.boot spring-boot-starter-quartz ②编写业务代码
在线Cron表达式生成器
@Component
 public class My {@Autowiredprivate EmpDao empDao;//定时任务执行的代码@Scheduled(cron = "0 0 2 * * ?")public void fun(){System.out.println("?????");empDao.selectAll();}
 }
③开启定时的注解驱动
标签:
相关文章
-
无相关信息