手把手带你搭建第一个SpringCloud项目(一)
目录
前言
一、SpringCloud是什么?
二、为什么要使用SpringCloud?
三、搭建第一个SpringCloud项目
1.技术选型
2.搭建一个简单的数据库
3.新建一个Maven工程
4.将打包方式修改成pom,引入对应的pom.xml依赖
5.创建一个CommonResult模块用来封装返回的结果
5.搭建模块cloud-provider-payment8001作为服务提供者
6.搭建cloud-consumer-order80作为服务消费者模块
结束语
我的一些其他与Springcloud有关的文章~欢迎大家观看喔
前言
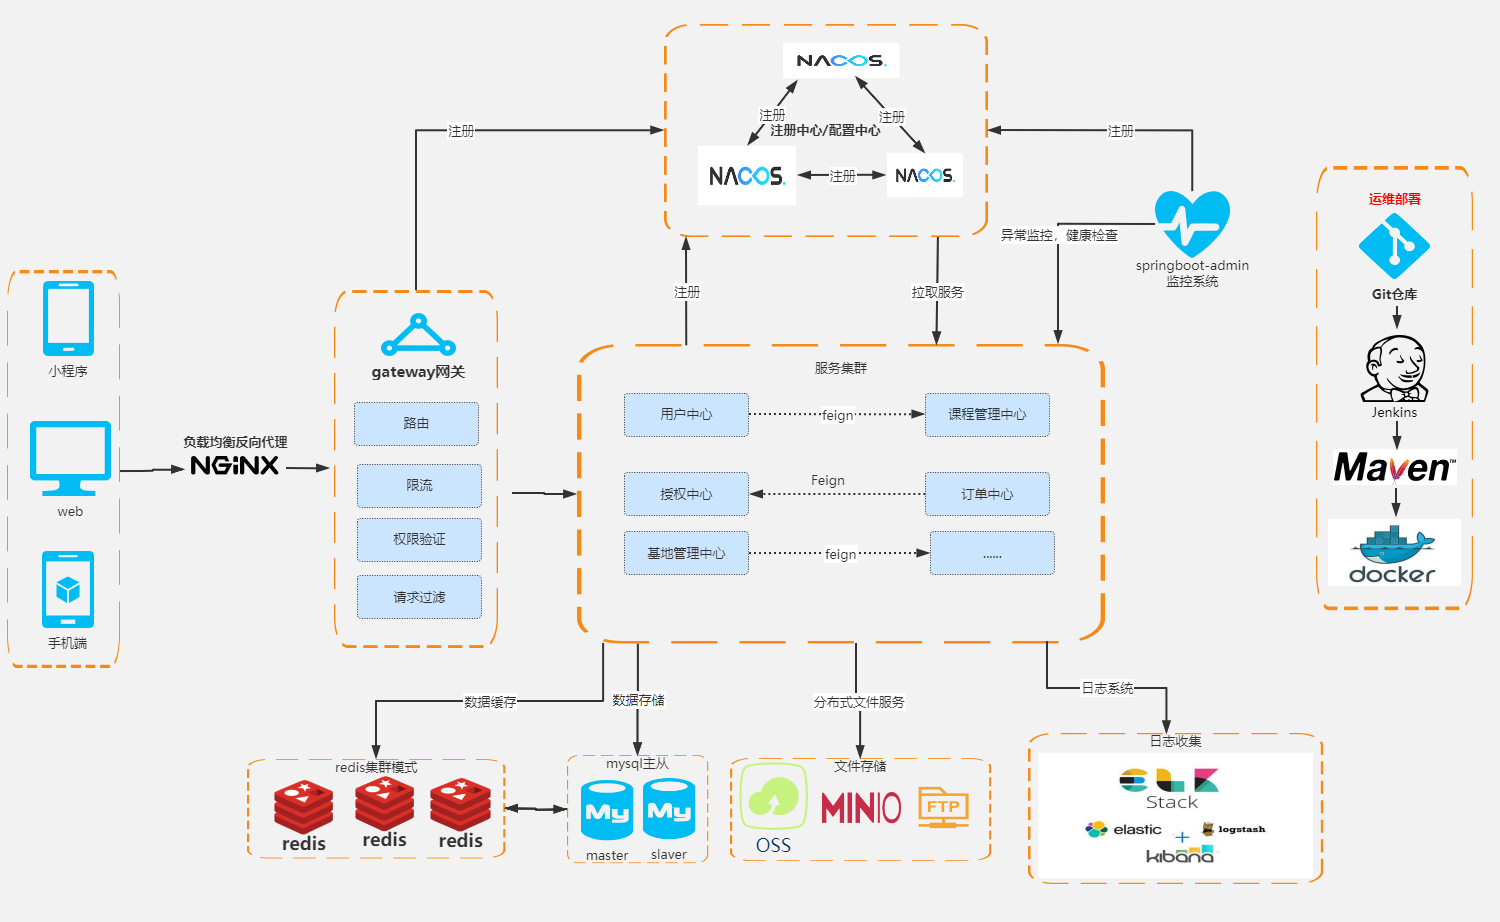
随着数据时代的发展,高访问量、高并发量越来越常见,数据量趋于海量,传统的单体应用架构有着难以理解和维护、开发效率低等缺点无法满足新时代的需求,为了更好地面对高并发海量数据的问题,便产生了微服务架构、分布式系统来面对海量的数据访问处理。
在这样的背景下,SpringCloud应运而生。对于中小型互联网公司来说,它们往往没有实力或者没有足够的资金投入去开发自己的分布式系统基础设施,而使用SpringCloud一站式解决方案能在从容应对业务发展的同时大大减少开发成本。因此,SpringCloud迅速拓宽市场面,成为了开发中不可或缺的角色。
一、SpringCloud是什么?
Spring Cloud 是一个基于 Spring Boot 实现的云应用开发工具,它为开发中的配置管理、服务发现、断路器、智能路由、微代理、控制总线、全局锁、决策竞选、分布式会话和集群状态管理等操作提供了一种简单的开发方式。

二、为什么要使用SpringCloud?
springcloud是spring生态下的产物,有着非常庞大的生态圈和很多可拿来即用的组件。能够很好的解决微服务架构开发中的许多问题。有着许多的优点:
三.搭建第一个SpringCloud项目
1.技术选型
在本次教学中,我所使用到的技术选型如下表所示,大家可以根据自己的情况对各项技术的版本做出适当调整~
Maven3.8.4JDK1.6SpringCloudHoxton.SR1SpringBoot2.2.2.RELEASEmysql8.0.212.搭建一个简单的数据库
本次我搭建的是一个简单的订单数据库用于我们的测试
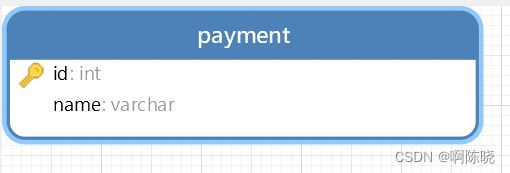
sql语句如下:
DROP TABLE IF EXISTS `payment`;
 CREATE TABLE `payment` (`id` int NOT NULL,`name` varchar(25) CHARACTER SET utf8 COLLATE utf8_bin DEFAULT NULL,PRIMARY KEY (`id`)
 ) ENGINE=InnoDB DEFAULT CHARSET=utf8mb3 COLLATE=utf8_bin;
3.新建一个Maven工程
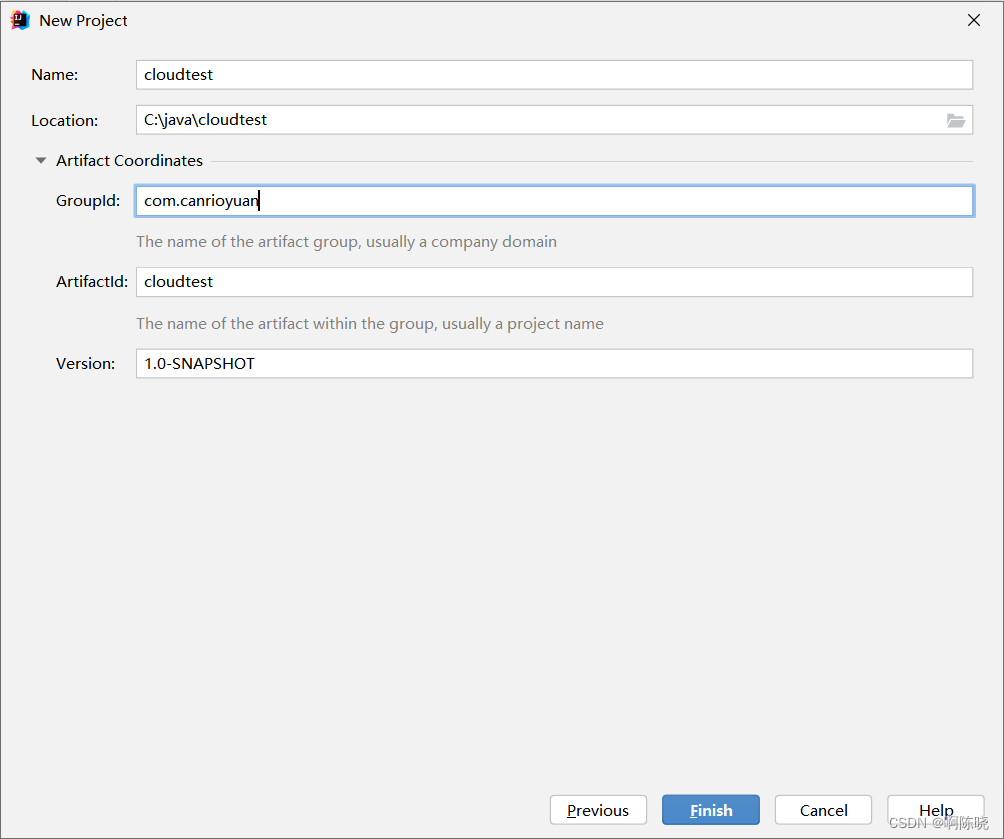
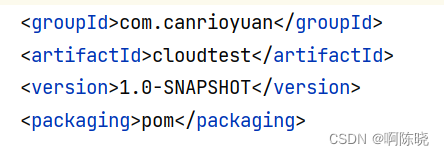
4.将打包方式修改成pom,引入对应的pom.xml依赖
UTF-8 1.8 1.8 4.12 1.2.17 1.18.24 8.0.21 1.1.21 3.5.1 org.springframework.boot spring-boot-dependencies 2.2.2.RELEASE pom import org.springframework.cloud spring-cloud-dependencies Hoxton.SR1 pom import com.alibaba.cloud spring-cloud-alibaba-dependencies 2.1.0.RELEASE pom import mysql mysql-connector-java ${mysql.version} com.alibaba druid-spring-boot-starter ${druid.version} com.baomidou mybatis-plus-boot-starter ${mybatis-plus.spring.boot.version} junit junit ${junit.version} log4j log4j ${log4j.version} org.projectlombok lombok ${lombok.version} true org.springframework.boot spring-boot-maven-plugin true true 5.创建一个CommonResult模块用来封装返回的结果
在cloudtest目录下新建一个cloud-api-commons module
在pom.xml文件中引入对应依赖
org.springframework.boot spring-boot-devtools runtime true cn.hutool hutool-all 5.1.0 org.projectlombok lombok 新建Payment类
package com.canrioyuan.pojo;import lombok.AllArgsConstructor;
 import lombok.Data;
 import lombok.NoArgsConstructor;import java.io.Serializable;
 @Data
 @AllArgsConstructor
 @NoArgsConstructor
 public class Payment implements Serializable {private Integer id;private String name;
 }
新建CommonResult类
package com.canrioyuan.pojo;import lombok.AllArgsConstructor;
 import lombok.Data;
 import lombok.NoArgsConstructor;/*** 前后端数据分离统一格式进行传参* @param */
 @Data
 @AllArgsConstructor
 @NoArgsConstructor
 public class CommonResult {//状态码private Integer code;//信息private String message;//传递的数据private T data;//有时候我们并不需要传递数据,因此我们可以设置一个data为空的构造方法public CommonResult(Integer code,String message){this(code,message,null);}
 }
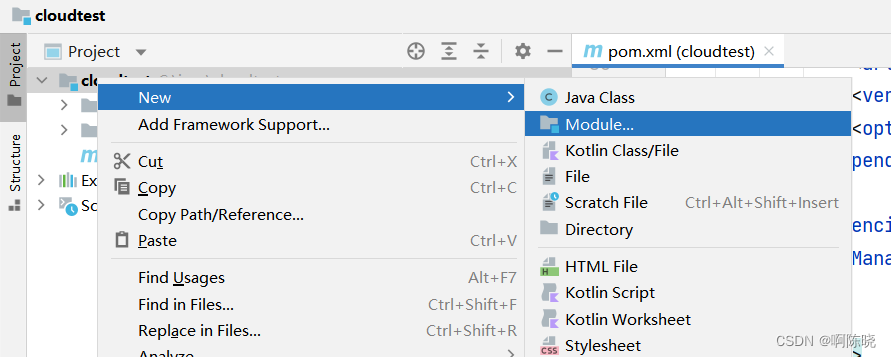
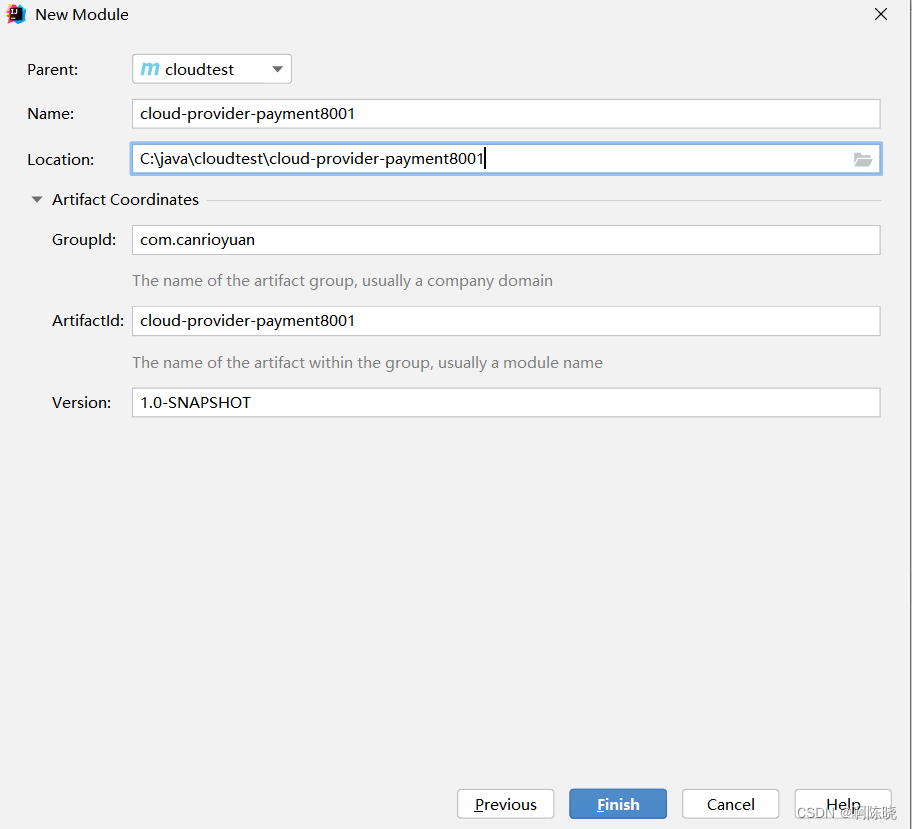
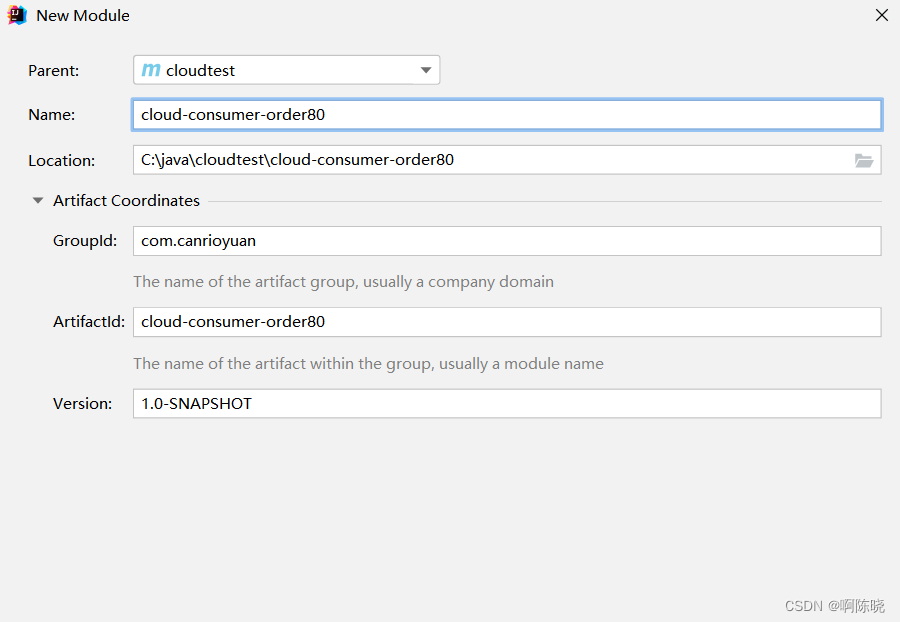
6.搭建模块cloud-provider-payment8001作为服务提供者
在cloudtest目录下新建一个module
修改cloud-provider-payment8001的pom.xml,加入一些通用的依赖
com.canrioyuan cloud-api-commons ${project.version} org.springframework.boot spring-boot-starter-web org.springframework.boot spring-boot-starter-actuator com.baomidou mybatis-plus-boot-starter com.alibaba druid-spring-boot-starter mysql mysql-connector-java org.springframework.boot spring-boot-starter-jdbc org.springframework.boot spring-boot-configuration-processor true org.projectlombok lombok true org.springframework.boot spring-boot-devtools runtime true org.springframework.boot spring-boot-starter-test test org.springframework.boot spring-boot-maven-plugin true true 在resource路径下新建一个application.yaml
server:port: 8001
 spring:application:name: cloud-payment-servicedatasource:type: com.alibaba.druid.pool.DruidDataSource            # 当前数据源操作类型driver-class-name: com.mysql.cj.jdbc.Driver            # mysql驱动包 com.mysql.jdbc.Driverurl: jdbc:mysql://localhost:3306/order01?useUnicode=true&characterEncoding=utf-8&useSSL=false&serverTimezone=GMTusername: rootpassword: password
在java.com.canrioyuan路径下编写启动类Payment8001
package com.canrioyuan;import org.mybatis.spring.annotation.MapperScan;
 import org.springframework.boot.SpringApplication;
 import org.springframework.boot.autoconfigure.SpringBootApplication;@SpringBootApplication
 @MapperScan(basePackages = "com.canrioyuan.mapper")
 public class Payment8001 {public static void main(String[] args) {SpringApplication.run(Payment8001.class,args);}
 }
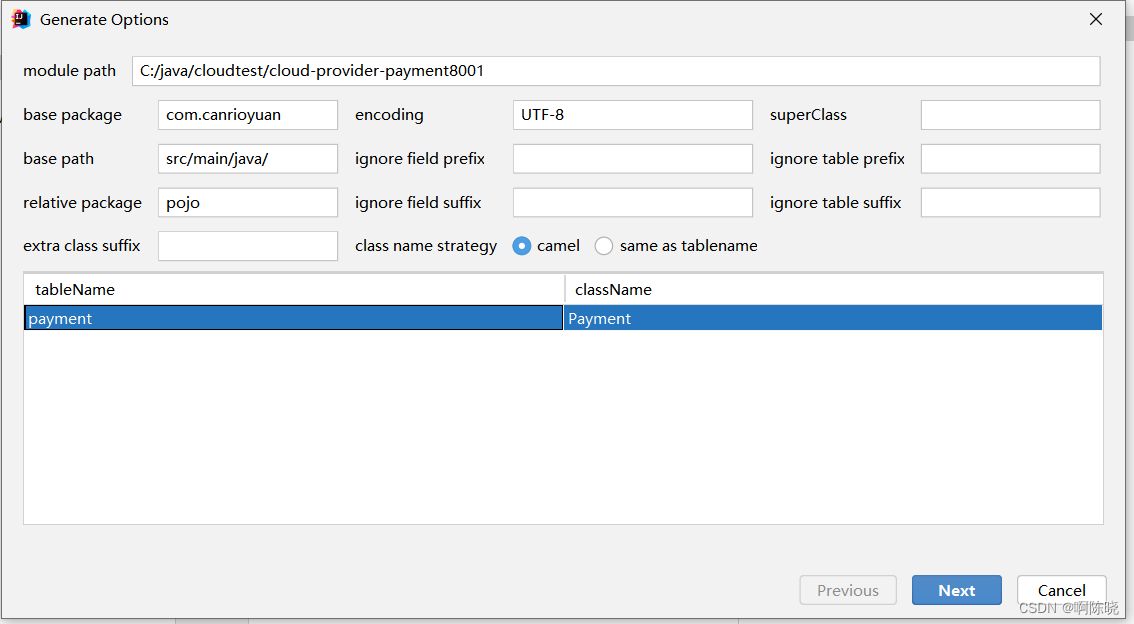
使用MybatisX插件生成对应的实体类、service和mapper
对MybatisX插件的使用不熟悉的小伙伴可以移步我的另外一篇文章喔,里面对MybatiX插件的使用有着详细的说明~
SpringBoot中MybatisX插件的简单使用教程(超详细!!)![]() https://blog.csdn.net/weixin_47025166/article/details/125362323?spm=1001.2014.3001.5502
https://blog.csdn.net/weixin_47025166/article/details/125362323?spm=1001.2014.3001.5502
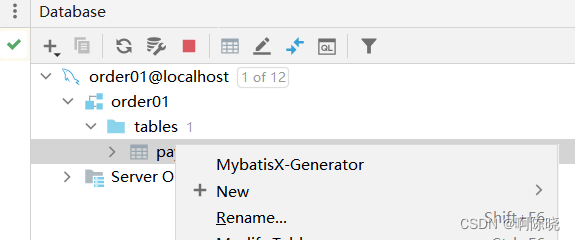
进入database

选择mysql数据库并进行连接


使用MybatiX插件生成对应的表的mapper、实体类...
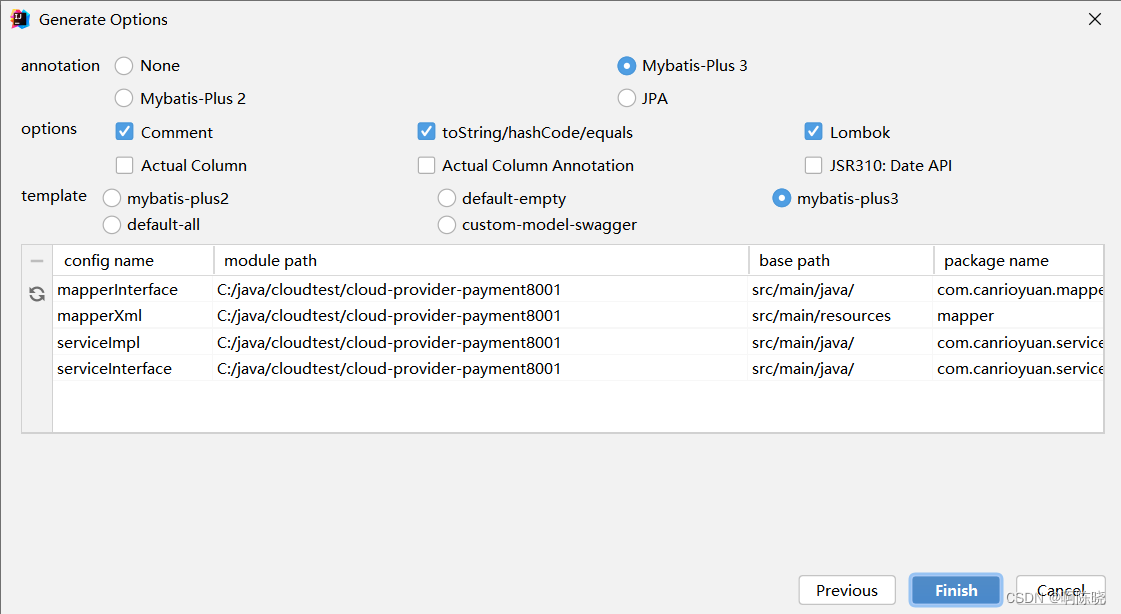
点击finsh后可以看到已经在对应的目录结构中生成了对应的文件

创建一个PayemntController
package com.canrioyuan.controller;import com.canrioyuan.Payment8001;
 import com.canrioyuan.pojo.CommonResult;
 import com.canrioyuan.pojo.Payment;
 import com.canrioyuan.service.PaymentService;
 import lombok.extern.slf4j.Slf4j;
 import org.springframework.beans.factory.annotation.Value;
 import org.springframework.web.bind.annotation.GetMapping;
 import org.springframework.web.bind.annotation.PathVariable;
 import org.springframework.web.bind.annotation.RestController;import javax.annotation.Resource;@RestController
 @Slf4j
 public class PaymentController {@Value("${server.port}")private String serverPort;@Resourceprivate PaymentService paymentService;@GetMapping("/payment/get/{id}")public CommonResult getPaymentById(@PathVariable("id") Integer id){//使用IService接口自带的方法Payment result = paymentService.getById(id);log.info("********结果为****" + result);if (result !=null) {return new CommonResult(200, "插入数据库成功" + ":" + serverPort, result);} else {return new CommonResult(400, "插入数据库失败", null);}}
 }
对接口进行测试:http://localhost:8001/payment/get/2,结果如下即访问成功

7.搭建cloud-consumer-order80作为服务消费者模块
修改pom.xml文件
com.canrioyuan cloud-api-commons ${project.version} org.springframework.boot spring-boot-starter-web org.springframework.boot spring-boot-starter-actuator org.springframework.boot spring-boot-devtools runtime true org.projectlombok lombok true org.springframework.boot spring-boot-starter-test test 在resources路径下新建一个application.yaml
server:port: 80在java.com.canrioyuan路径下编写启动类Order80
package com.canrioyuan;import org.springframework.boot.SpringApplication;
 import org.springframework.boot.autoconfigure.SpringBootApplication;@SpringBootApplication
 public class Order80 {public static void main(String[] args) {SpringApplication.run(Order80.class,args);}
 }
创建一个配置类ApplicationContextConfig向容器中注入RestTemplate
package com.canrioyuan.config;import org.springframework.context.annotation.Bean;
 import org.springframework.context.annotation.Configuration;
 import org.springframework.web.client.RestTemplate;@Configuration
 public class ApplicationContextConfig {@Beanpublic RestTemplate getRestTemplate(){return new RestTemplate();}
 }
编写OrderController
package com.canrioyuan.controller;import com.canrioyuan.pojo.CommonResult;
 import lombok.extern.slf4j.Slf4j;
 import org.springframework.web.bind.annotation.GetMapping;
 import org.springframework.web.bind.annotation.PathVariable;
 import org.springframework.web.bind.annotation.RestController;
 import org.springframework.web.client.RestTemplate;import javax.annotation.Resource;@RestController
 @Slf4j
 public class OrderController {@Resourceprivate RestTemplate restTemplate;private final String URL="http://localhost:8001";@GetMapping("/consumer/payment/get/{id}")public CommonResult getPaymentById(@PathVariable("id")Integer id){return restTemplate.getForObject(URL+"/payment/get/"+id, CommonResult.class,id);}
 }
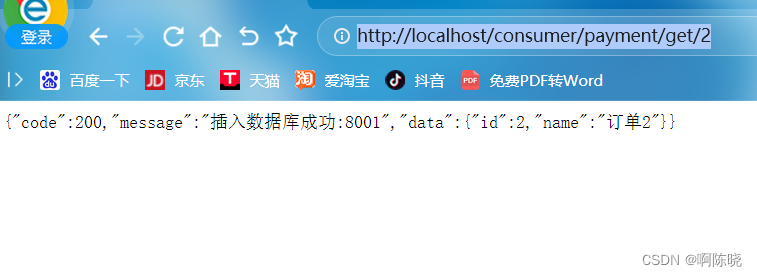
对接口进行测试http://localhost/consumer/payment/get/2,若如下图所示,则访问成功:
结束语
至此,我们第一个简单的SpringCloud的开发就就结束啦~
感谢您的阅读,希望我的文章能给你带来帮助!!!

标签:
相关文章
-
无相关信息