Spring Boot – Thymeleaf 示例
Thymeleaf是一个基于 Java 的服务器端模板引擎,适用于 Web 和独立环境,能够处理 HTML、XML、JavaScript、CSS 甚至纯文本。它比 JPS 更强大,负责 UI 上的动态内容渲染。该引擎允许后端和前端开发人员在同一视图上并行工作。它可以直接访问 java 对象和 spring bean 并将它们与 UI 绑定。当我们创建任何 Web 应用程序时,它主要与 Spring MVC 一起使用。因此,让我们从一个示例开始,了解 Thymeleaf 如何与 Spring 框架一起工作。
项目设置
在这里,我们将对 Employee 数据集执行 crud 操作。因此,为了构建它,我们必须添加某些以项目符号形式或也在 pom.xml 中列出的依赖项。
pom.xml
4.0.0 org.springframework.boot spring-boot-starter-parent 2.6.2 com.example thymeleaf 0.0.1-SNAPSHOT thymeleaf Demo project for Spring Boot 17 org.springframework.boot spring-boot-starter-data-jpa org.springframework.boot spring-boot-starter-thymeleaf org.springframework.boot spring-boot-starter-web org.springframework.boot spring-boot-devtools runtime true mysql mysql-connector-java runtime org.springframework.boot spring-boot-starter-test test org.springframework.boot spring-boot-maven-plugin application.properties 文件
spring.jpa.hibernate.ddl-auto=update
 spring.datasource.url=jdbc:mysql://localhost:3306/emp
 spring.datasource.username=root
 spring.datasource.password=root
 spring.jpa.properties.hibrenate.dialect=org.hibernate.dialect.MySQLInnoDBDialect
 logging.level.org.hibrenate.SQL=DEBUG
 logging.level.org.hibrenate.type=TRACE
Employee pojo
这是一个简单的 pojo 类,用于存储 Employee 的数据。
package com.microservice.modal;import javax.persistence.Entity;
 import javax.persistence.GeneratedValue;
 import javax.persistence.GenerationType;
 import javax.persistence.Id;@Entity
 public class Employee {@Id@GeneratedValue(strategy = GenerationType.IDENTITY)private long id;private String name;private String email;public long getId() {return id;}public void setId(long id) {this.id = id;}public String getName() {return name;}public void setName(String name) {this.name = name;}public String getEmail() {return email;}public void setEmail(String email) {this.email = email;}
 }
Employee Service 接口和 EmployeeServiceImpl 类
package com.microservice.service;import java.util.List;import com.microservice.modal.Employee;public interface EmployeeServices {List getAllEmployee();void save(Employee employee);Employee getById(Long id);void deleteViaId(long id);
 }
实现 EmployeeSerivce 接口方法的 EmployeeServiceImpl 类
package com.microservice.service;import com.microservice.modal.Employee;
 import com.microservice.repository.EmployeeRepository;
 import java.util.List;
 import java.util.Optional;
 import org.springframework.beans.factory.annotation.Autowired;
 import org.springframework.stereotype.Service;@Service
 public class EmployeeServiceImplimplements EmployeeServices {@Autowiredprivate EmployeeRepository empRepo;@Overridepublic List getAllEmployee() {return empRepo.findAll();}@Overridepublic void save(Employee employee) {empRepo.save(employee);}@Overridepublic Employee getById(Long id) {Optional optional = empRepo.findById(id);Employee employee = null;if (optional.isPresent()) {employee = optional.get();} else {throw new RuntimeException("Employee not found for id : " + id);}return employee;}@Overridepublic void deleteViaId(long id) {empRepo.deleteById(id);}
 }
EmployeeRepository 接口
在这里,我们使用 JPA 进行通信并将对象保存到数据库中。
package com.microservice.repository;import org.springframework.data.jpa.repository.JpaRepository;
 import org.springframework.stereotype.Repository;import com.microservice.modal.Employee;@Repository
 public interface EmployeeRepository extends JpaRepository {}
EmployeeController类
这是控制器类,它基本上控制数据的流动。它控制数据流入模型对象并在数据更改时更新视图。所以在这里我们用 Thymeleaf 映射我们的对象数据。
package com.microservice.controller;import org.springframework.beans.factory.annotation.Autowired;
 import org.springframework.stereotype.Controller;
 import org.springframework.ui.Model;
 import org.springframework.web.bind.annotation.GetMapping;
 import org.springframework.web.bind.annotation.ModelAttribute;
 import org.springframework.web.bind.annotation.PathVariable;
 import org.springframework.web.bind.annotation.PostMapping;import com.microservice.modal.Employee;
 import com.microservice.service.EmployeeServiceImpl;@Controller
 public class EmployeeController {@Autowiredprivate EmployeeServiceImpl employeeServiceImpl;@GetMapping("/")public String viewHomePage(Model model) {model.addAttribute("allemplist", employeeServiceImpl.getAllEmployee());return "index";}@GetMapping("/addnew")public String addNewEmployee(Model model) {Employee employee = new Employee();model.addAttribute("employee", employee);return "newemployee";}@PostMapping("/save")public String saveEmployee(@ModelAttribute("employee") Employee employee) {employeeServiceImpl.save(employee);return "redirect:/";}@GetMapping("/showFormForUpdate/{id}")public String updateForm(@PathVariable(value = "id") long id, Model model) {Employee employee = employeeServiceImpl.getById(id);model.addAttribute("employee", employee);return "update";}@GetMapping("/deleteEmployee/{id}")public String deleteThroughId(@PathVariable(value = "id") long id) {employeeServiceImpl.deleteViaId(id);return "redirect:/";}
 }
index.html
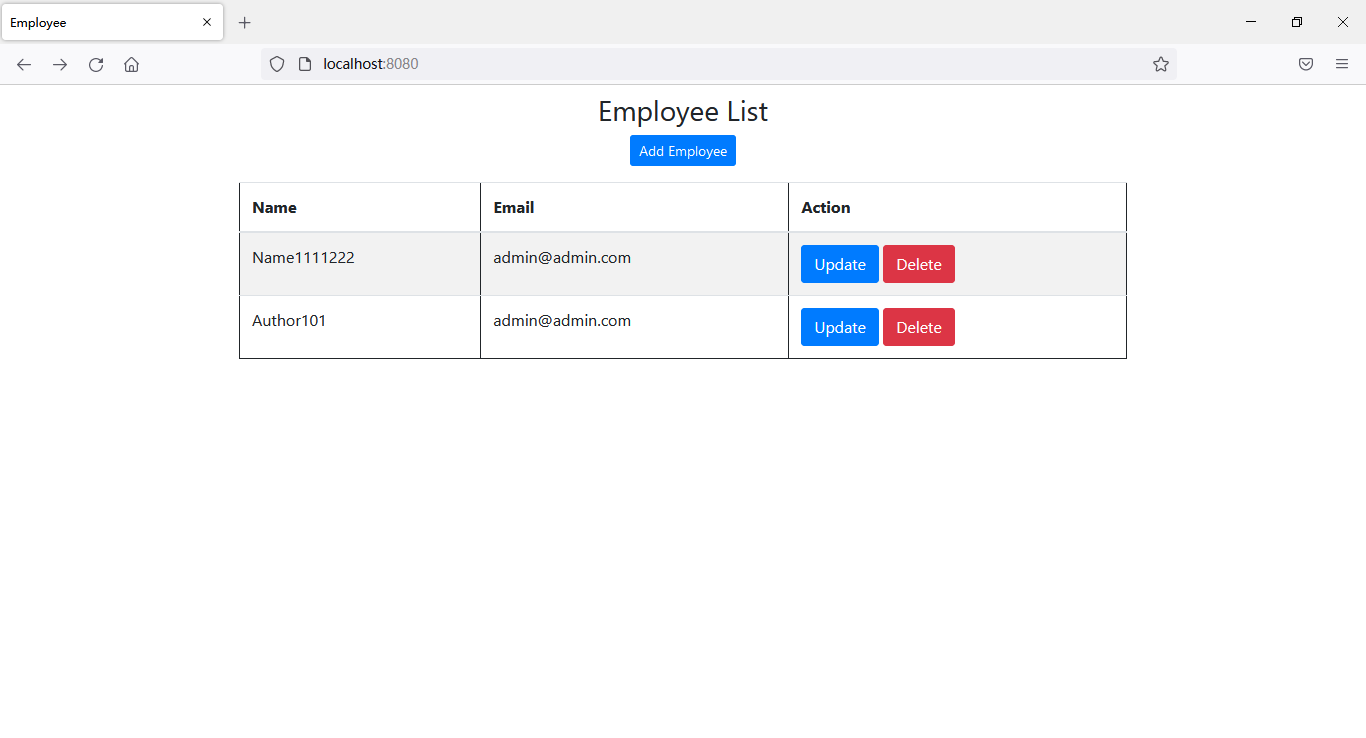
此页面用于显示员工列表。在这里,我们正在遍历控制器从viewHomePage()方法 发送的allemplist 对象。
Employee
newemployee.html
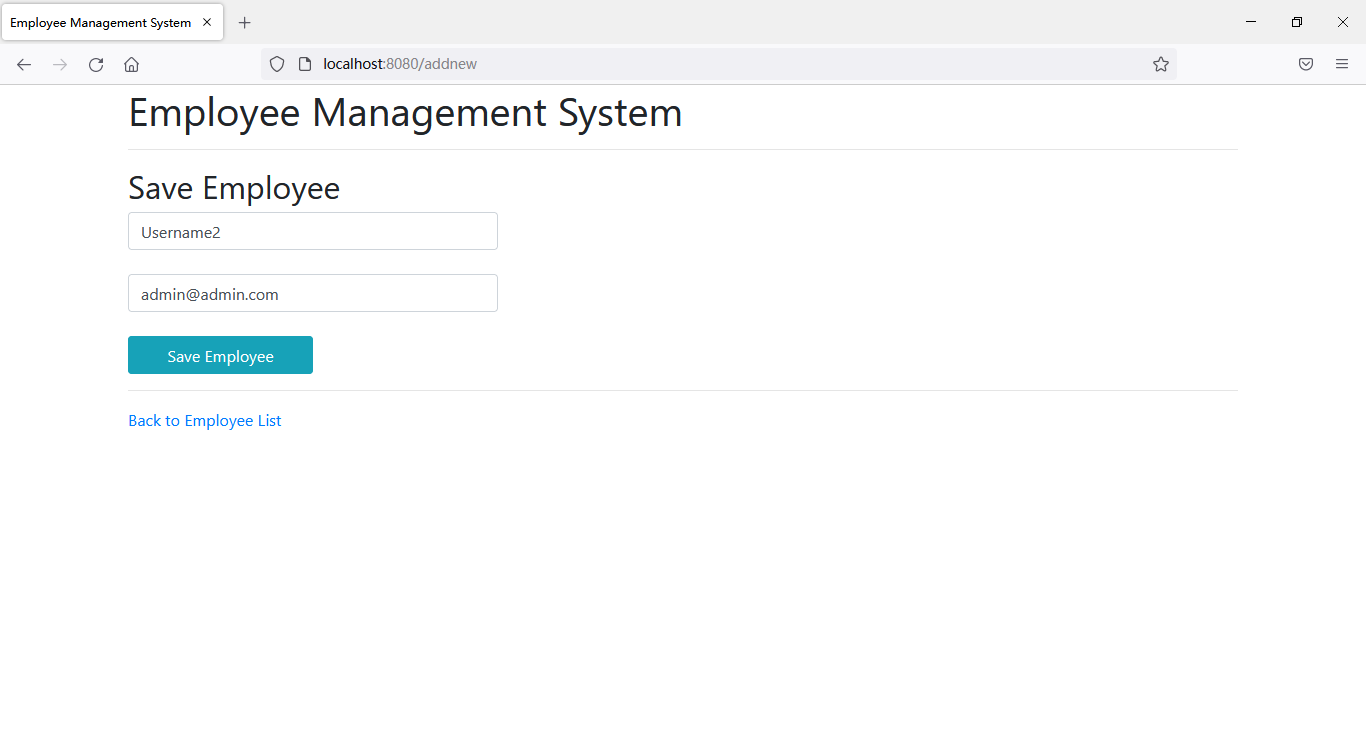
此页面用于在数据库中添加新员工。在这里,我们只需在空字段中提供值并单击提交按钮。然后员工的数据转到saveEmployee()方法并将数据保存到数据库中。
Employee Management System
update.html
此页面用于更新现有员工的数据。
Employee Management System
输出:


标签:
相关文章
-
无相关信息
