Spring Boot开发自定义的starter
目录
一、Spring Boot的starter概述
二、自定义starter的命名规则
三、自定义starter实战
1. 创建spring工程
2. 修改pom.xml
3. 编写配置类
4. 安装到本地maven仓库
5. 在其他项目中引入
6. 测试
一、Spring Boot的starter概述
SpringBoot中的starter是一种非常重要的机制,能够抛弃以前繁杂的配置,将其统一集成进starter,应用者只需要在maven中引入starter依赖,SpringBoot就能自动扫描到要加载的信息并启动相应的默认配置。starter让我们摆脱了各种依赖库的处理,需要配置各种信息的困扰。SpringBoot会自动通过classpath路径下的类发现需要的Bean,并注册进IOC容器。SpringBoot提供了针对日常企业应用研发各种场景的spring-boot-starter依赖模块。所有这些依赖模块都遵循着约定成俗的默认配置,并允许我们调整这些配置,即遵循“约定大于配置”的理念。
二、自定义starter的命名规则
官方:spring-boot-starter-xxx
自定义:xxx-spring-boot-starter
三、自定义starter实战
这里我们编写一个发送http请求的starter
1. 创建spring工程

根据需要引入依赖,Spring Configuration Processor 可以自动生成配置时的代码提示

2. 修改pom.xml
创建spring工程后,可以在pom文件里看到当前项目的 GAV

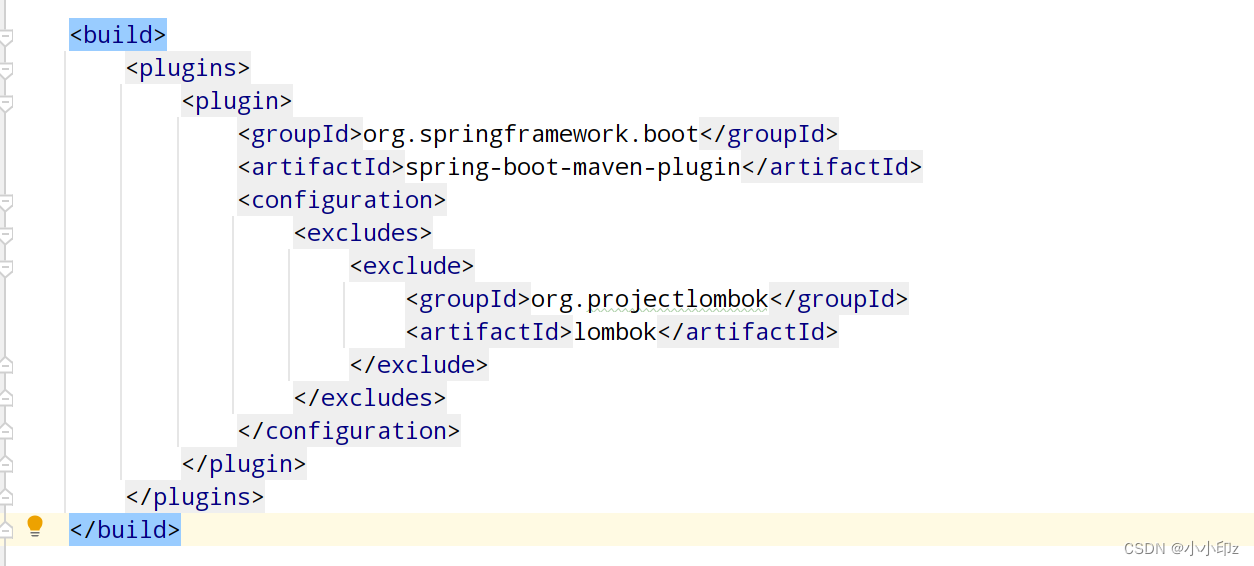
然后删除 bulid 模块

引入 hutool 依赖,使用hutool的 Http客户端工具类来发送http请求。
官网地址:Hutool — 🍬A set of tools that keep Java sweet.
cn.hutool hutool-all 5.8.11 3. 编写配置类
starter工程不需要Application启动类,可以将其删除
(1)创建OpenApiClient
getNameByGet方法可以向 "http://localhost:8123/api/name/"发送请求,携带一个name参数。
public class OpenApiClient {public String getNameByGet(String name) {//可以单独传入http参数,这样参数会自动做URL编码,拼接在URL中HashMap paramMap = new HashMap<>();paramMap.put("name", name);String result= HttpUtil.get("http://localhost:8123/api/name/", paramMap);return result;}
 }
(2)编写配置类
在配置类中注入了OpenApiClient
@Configuration
 @ConfigurationProperties("openapi.client")
 @Data
 @ComponentScan
 public class OpenaipClientConfig {@Beanpublic OpenApiClient openApiClient() {return new OpenApiClient();}
 }
(3)编写 spring.factories 文件
spring.factories用键值对的方式记录了所有需要加入容器的类
在resource目录下新建 META-INF 目录,在META-INF 目录中创建spring.factories 文件

文件内容如下:
org.springframework.boot.autoconfigure.EnableAutoConfiguration=com.zy.demospringbootstarter.OpenaipClientConfig4. 安装到本地maven仓库
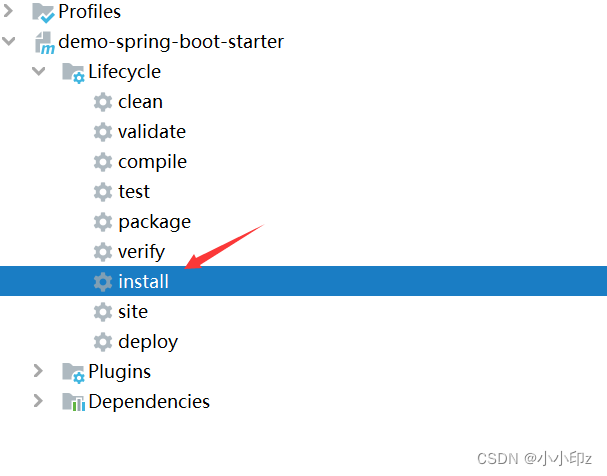
双击install,将这个starter工程打包放入maven仓库,如果提示test相关错误,将test模块删除即可。


可以看到在本地仓库以及有了这个starter的依赖。
5. 在其他项目中引入
在其他工程的pom文件中引入我们自定义的starter,像引入其他starter一样

6. 测试
当调用我们自定义starter的 getNameByGet() 方法时,会自动向运行在8123端口的项目发送请求。


自动注入
测试方法:
@Testpublic void testStarter() {String result = openApiClient.getNameByGet("xiaoxiaoyin");System.out.println(result);}测试结果:

这样就完成了自定义starter的开发,在实际使用中,可以根据自己需要,编写方便自己调用的starter。
标签:
相关文章
-
无相关信息

