SpringCloud整合Swagger3
前言
现在微服务框架已经整合到Swagger接口文档这一块了,记录一下整合中碰到的一些问题吧!我这整合的环境是SpringCloud+SpringCloudAlibaba+SpringCloudGateway+SpringSecurityOAuth2+Nacos+Swagger3,这些框架整合的时候版本适配是一个大问题,然后就是不同版本的细节问题,再就是加了安全框架后请求拦截问题,然后还有SpringCloudGateway做聚合文档的时候一些列问题,那么本文就给大家把这几个问题一一道来,整合的流程是这样的,想完成单服SpringBoot集成Swagger3,然后再在网关成做一次聚合即可!
版本适配问题
起初这个版本问题我只在SpringCloud整合SpringSecurityOAuth2中做过适配,当时版本如下
org.springframework.boot spring-boot-starter-parent 2.1.3.RELEASE Greenwich.SR3 2.1.0.RELEASE
这里SpringCloud整合SpringSecurityOAuth2确实是没什么问题的,但是后面整合Swagger3的时候问题就来了,然后果断将版本切换到跟高的版本!
org.springframework.boot spring-boot-starter-parent 2.3.4.RELEASE Hoxton.SR9 2.2.1.RELEASE
这里细心的朋友就会发现我这里还把SpringCloudAlibaba的版本也审计了一下,在后面SpringCloudGateway做聚合的时候讲,这里的依赖版本和我的一致后,那么下面整合起来就轻松很多了,不会出现各种找不到类呀什么的报错!
Swagger3整合
1.导入依赖
Swagger3这个版本的整合和Swagger2的整合是不一样的,首先引入的依赖就有变化,下面这个是常规Swagger3的导法
io.springfox springfox-boot-starter 3.0.0
com.github.xiaoymin knife4j-spring-boot-starter 2.0.6
升级后Swagger3导入其实只需要一个依赖搞定!
io.springfox springfox-boot-starter 3.0.0
2.编写相应代码
说白了其实也就一个配置类,但是定义一套规范,我们还是定义一个Properties类,用来映射配置文件,这里需要注意一下,需要使用一个配置文件处理器的依赖,如果不需要这个Properties类的话可以忽略
org.springframework.boot spring-boot-configuration-processor true SwaggerProperties类
/*** @description: 映射配置文件Swagger基本属性* @author TAO* @date 2021/4/25 13:18
 */
 @Data
 @Configuration
 @ConfigurationProperties("swagger")
 public class SwaggerProperties {/*** 是否开启swagger*/private Boolean enabled;/*** swagger会解析的包路径**/private String basePackage = "";/*** swagger会解析的url规则**/private List basePath = new ArrayList<>();/*** 在basePath基础上需要排除的url规则**/private List excludePath = new ArrayList<>();/*** 需要排除的服务*/private List ignoreProviders = new ArrayList<>();/*** 标题**/private String title = "";/*** 描述**/private String description = "";/*** 版本**/private String version = "";/*** 许可证**/private String license = "";/*** 许可证URL**/private String licenseUrl = "";/*** 服务条款URL**/private String termsOfServiceUrl = "";/*** host信息**/private String host = "";/*** 联系人信息*/private Contact contact = new Contact();/*** 全局统一鉴权配置**/private Authorization authorization = new Authorization();@Data@NoArgsConstructorpublic static class Contact {/*** 联系人**/private String name = "";/*** 联系人url**/private String url = "";/*** 联系人email**/private String email = "";}@Data@NoArgsConstructorpublic static class Authorization {/*** 鉴权策略ID,需要和SecurityReferences ID保持一致*/private String name = "";/*** 需要开启鉴权URL的正则*/private String authRegex = "^.*$";/*** 鉴权作用域列表*/private List authorizationScopeList = new ArrayList<>();private List tokenUrlList = new ArrayList<>();}@Data@NoArgsConstructorpublic static class AuthorizationScope {/*** 作用域名称*/private String scope = "";/*** 作用域描述*/private String description = "";}
 }
SwaggerAutoConfig类
@Slf4j
 @Configuration
 @EnableAutoConfiguration
 @EnableOpenApi//开启swagger,当前版本为3 所以注解和2@EnableSwagger2的版本不同
 //或者直接省略prefix,那么直接写为swagger.enabled,当配置中存在swagger.enabled生效,matchIfMissing = true默认生效
 @ConditionalOnProperty(prefix = "swagger",name = "enabled", matchIfMissing = true)
 public class SwaggerAutoConfig {//默认的排除路径,排除Spring Boot默认的错误处理路径和端点(在解析的url规则之上)  /*/error,由于服务通常加前缀,所以前面/*忽略前缀private static final List DEFAULT_EXCLUDE_PATH = Arrays.asList("/error","/actuator/**","/*/error");//swagger会解析的url规则private static final String BASE_PATH = "/**";@Autowiredprivate SwaggerProperties swaggerProperties;@Beanpublic Docket createRestApi() {// base-path处理if (swaggerProperties.getBasePath().isEmpty()) {swaggerProperties.getBasePath().add(BASE_PATH);}// exclude-path处理if (swaggerProperties.getExcludePath().isEmpty()) {swaggerProperties.getExcludePath().addAll(DEFAULT_EXCLUDE_PATH);}//需要排除的urlList> excludePath = new ArrayList<>();swaggerProperties.getExcludePath().forEach(path -> excludePath.add(PathSelectors.ant(path)));// 版本请求头处理List pars = new ArrayList<>();RequestParameterBuilder versionPar = new RequestParameterBuilder().description("灰度路由版本信息").in(ParameterType.HEADER).name("VERSION").required(false).query(param -> param.model(model -> model.scalarModel(ScalarType.STRING)));pars.add(versionPar.build());ApiSelectorBuilder builder = new Docket(DocumentationType.OAS_30).host(swaggerProperties.getHost()).apiInfo(apiInfo()).globalRequestParameters(pars).select().apis(RequestHandlerSelectors.basePackage(swaggerProperties.getBasePackage()));swaggerProperties.getBasePath().forEach(p -> builder.paths(PathSelectors.ant(p)));swaggerProperties.getExcludePath().forEach(p -> builder.paths(PathSelectors.ant(p).negate()));return builder.build().securitySchemes(Collections.singletonList(securitySchema())).securityContexts(Collections.singletonList(securityContext())).pathMapping("/");}/*** 配置默认的全局鉴权策略的开关,通过正则表达式进行匹配;默认匹配所有URL* @return*/private SecurityContext securityContext() {return SecurityContext.builder().securityReferences(defaultAuth()).build();}/*** 默认的全局鉴权策略* @return*/private List defaultAuth() {ArrayList authorizationScopeList = new ArrayList<>();swaggerProperties.getAuthorization().getAuthorizationScopeList().forEach(authorizationScope -> authorizationScopeList.add(new AuthorizationScope(authorizationScope.getScope(), authorizationScope.getDescription())));AuthorizationScope[] authorizationScopes = new AuthorizationScope[authorizationScopeList.size()];return Collections.singletonList(SecurityReference.builder().reference(swaggerProperties.getAuthorization().getName()).scopes(authorizationScopeList.toArray(authorizationScopes)).build());}private OAuth securitySchema() {ArrayList authorizationScopeList = new ArrayList<>();swaggerProperties.getAuthorization().getAuthorizationScopeList().forEach(authorizationScope -> authorizationScopeList.add(new AuthorizationScope(authorizationScope.getScope(), authorizationScope.getDescription())));ArrayList grantTypes = new ArrayList<>();swaggerProperties.getAuthorization().getTokenUrlList().forEach(tokenUrl -> grantTypes.add(new ResourceOwnerPasswordCredentialsGrant(tokenUrl)));return new OAuth(swaggerProperties.getAuthorization().getName(), authorizationScopeList, grantTypes);}private ApiInfo apiInfo() {return new ApiInfoBuilder().title(swaggerProperties.getTitle()).description(swaggerProperties.getDescription()).version(swaggerProperties.getVersion()).license(swaggerProperties.getLicense()).licenseUrl(swaggerProperties.getLicenseUrl()).termsOfServiceUrl(swaggerProperties.getTermsOfServiceUrl()).contact(new Contact(swaggerProperties.getContact().getName(),swaggerProperties.getContact().getUrl(),swaggerProperties.getContact().getEmail())).build();}}
照着copy即可,说明都写在代码注释里面了!
这两个类最好还是直接新起一个Swagger的项目,单独写Swagger的代码,方便后期维护

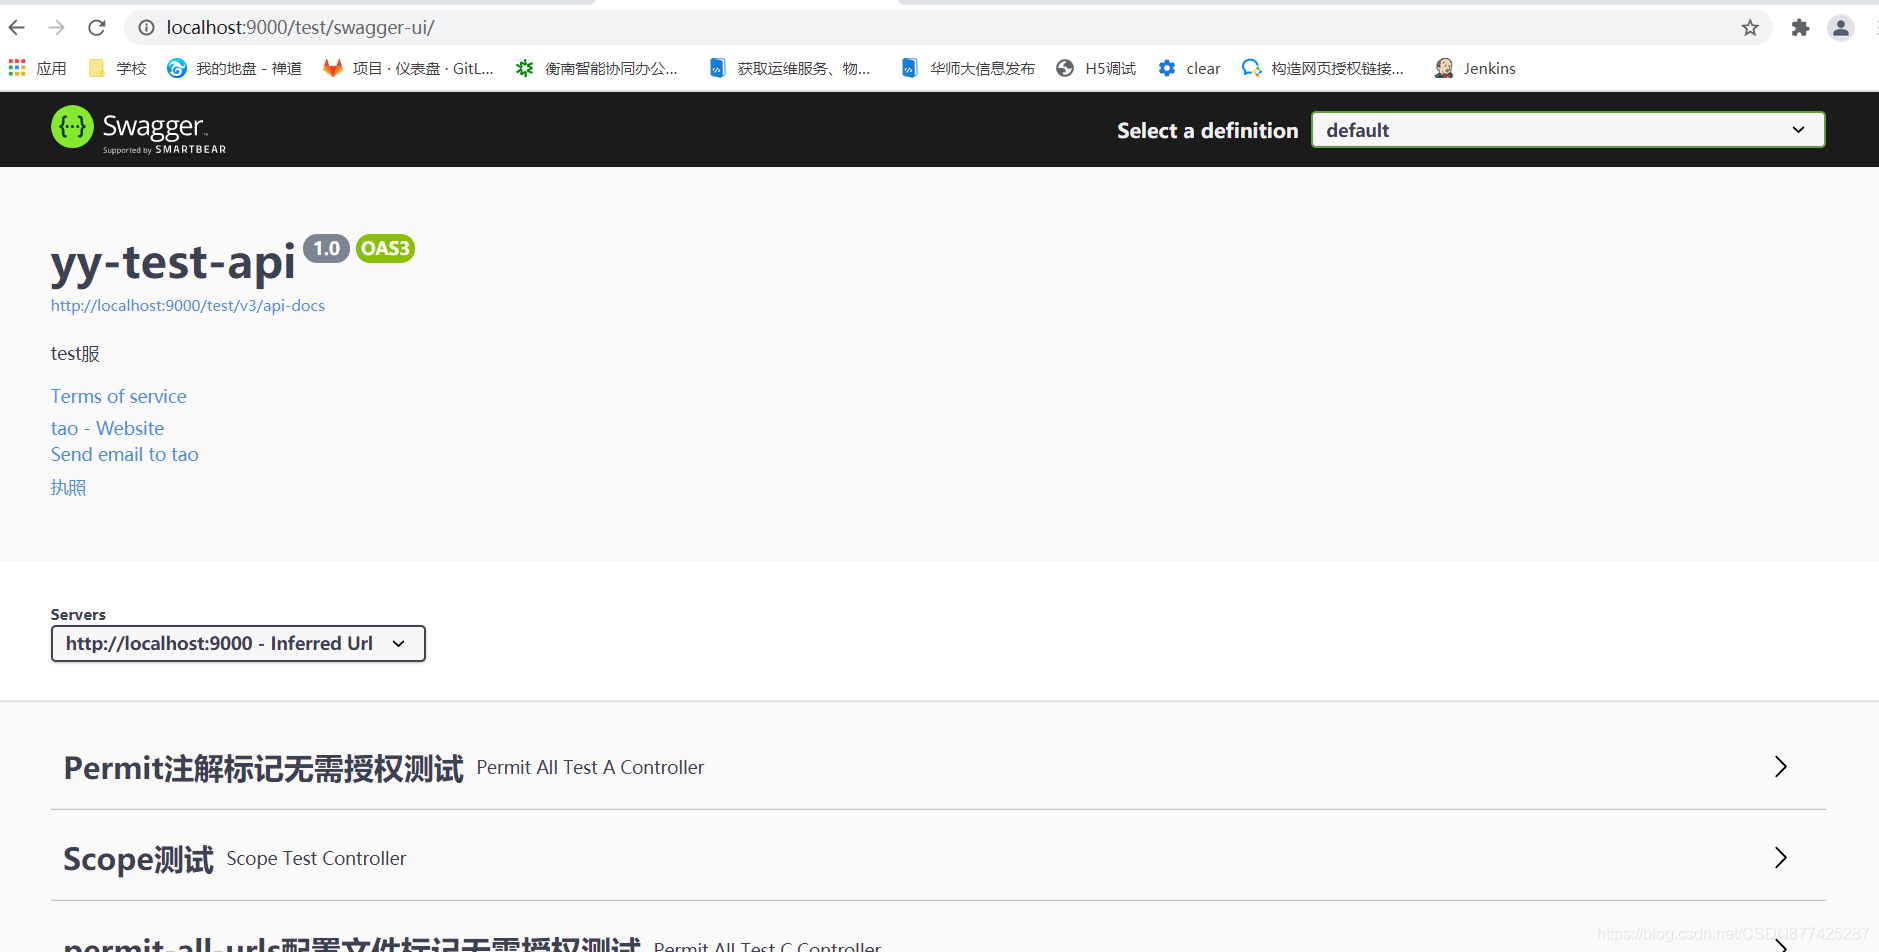
这两个类编写完后,那么Swagger3就已经整合完成了!那么我们现在用yy-test服务使用一下Swagger3,
其他服务使用Swagger3

在Controller上添加如下代码,方便测试
@Api(value = "r", tags = "权限测试接口")
yml添加如下配置
swagger:title: yy-test-apidescription: "test服"version: 1.0license: "xxx"licenseUrl: http://baidu.comterms-of-service-url: http://baidu.comcontact:name: taoemail: 11111url: http://baidu.comauthorization:name: pig4cloud OAuthauth-regex: ^.*$authorization-scope-list:- scope: serverdescription: server alltoken-url-list:- http://${GATEWAY_HOST:yy-gateway}:${GATEWAY-PORT:5000}/auth/oauth/token启动访问测试!
那么单服就整合完毕了!这里有几个问题说一下,我这里别看三两下就搞好了,有些细节还是没有体现的,如我这里整合了SpringSecurityOAuth2,这个地方在yy-test服务中导入的yy-security这个依赖,如果项目中使用了安全框架,那么请放开这些路径,否者会出一些问题
.antMatchers( "/doc.html","/v3/**",//此请求不放开会导致 error api-docs无法正常显示 https://songzixian.com/javalog/905.html"/swagger-ui**","/swagger-ui/**",//此请求不放开没有权限请求一直失败,处于轮询接口"/swagger-resources/**",//此请求不放开导致访问出现Unable to infer base url. This is common when using dynamic servlet registration or when the API is https://blog.csdn.net/just_now_and_future/article/details/89343680"/webjars/**").permitAll()
在然后就是我们这整合的是Swagger3的版本,访问路径已经发生了变更,已经不在是Swagger2的swagger.html了,是swagger-ui
聚合文档
做聚合的前提是确保单服的Swagger能正常使用,然后才能做网关的聚合,因为这里做聚合就是在上面没问题的基础之上的!下面这些代码是写在网关服里的注意

1.依赖导入
com.tao yy-swagger 1.0-SNAPSHOT org.springframework.cloud spring-cloud-starter-gateway org.springframework spring-webflux org.springframework.cloud spring-cloud-gateway-server org.springframework.cloud spring-cloud-commons com.alibaba.cloud spring-cloud-starter-alibaba-nacos-discovery 编写Gateway和Swagger的配置
@Slf4j
 @Configuration
 @ConditionalOnWebApplication(type = ConditionalOnWebApplication.Type.REACTIVE)//当Spring为web服务时,才使注解的类生效;通常是配置类;
 public class GatewaySwaggerAutoConfiguration {@Autowiredprivate SwaggerResourceHandler swaggerResourceHandler;@Autowiredprivate SwaggerSecurityHandler swaggerSecurityHandler;@Autowiredprivate SwaggerUiHandler swaggerUiHandler;/*** 路由映射,将Swagger相关URL映射到相应处理器上*/@Beanpublic RouterFunction swaggerRouterFunction() {return RouterFunctions.route(RequestPredicates.GET("/swagger-resources").and(RequestPredicates.accept(MediaType.ALL)), swaggerResourceHandler).andRoute(RequestPredicates.GET("/swagger-resources/configuration/ui").and(RequestPredicates.accept(MediaType.ALL)), swaggerUiHandler).andRoute(RequestPredicates.GET("/swagger-resources/configuration/security").and(RequestPredicates.accept(MediaType.ALL)), swaggerSecurityHandler);}}
2.编写一下几个处理器
SwaggerResourceHandler
/*** @author TAO* @description: 提供Swagger3 获取注册中心的服务资源  http://localhost:5000/swagger-resources* @date 2021/4/28 22:33*/
 @Slf4j
 @Component
 public class SwaggerResourceHandler implements HandlerFunction {@Autowiredprivate SwaggerResourcesProvider swaggerResources;@Overridepublic Mono handle(ServerRequest request) {return ServerResponse.status(HttpStatus.OK).contentType(MediaType.APPLICATION_JSON).body(BodyInserters.fromValue(swaggerResources.get()));}}
SwaggerSecurityHandler
/*** @author TAO* @description: 提供Swagger3 安全相关处理器* @date 2021/4/28 22:30*/@Slf4j
 @Component
 public class SwaggerSecurityHandler implements HandlerFunction {@Autowired(required = false)private SecurityConfiguration securityConfiguration;@Overridepublic Mono handle(ServerRequest request) {return ServerResponse.status(HttpStatus.OK).contentType(MediaType.APPLICATION_JSON).body(BodyInserters.fromValue(Optional.ofNullable(securityConfiguration).orElse(SecurityConfigurationBuilder.builder().build())));}}
SwaggerUiHandler
/*** @author TAO* @description: 提供Swagger3 UI层配置数据  http://localhost:5000/swagger-resources/configuration/ui* @date 2021/4/28 22:27*/@Slf4j
 @Component
 public class SwaggerUiHandler implements HandlerFunction {@Autowired(required = false)private UiConfiguration uiConfiguration;@Overridepublic Mono handle(ServerRequest request) {return ServerResponse.status(HttpStatus.OK).contentType(MediaType.APPLICATION_JSON).body(BodyInserters.fromValue(Optional.ofNullable(uiConfiguration).orElse(UiConfigurationBuilder.builder().build())));}}
3.编写SwaggerProvider
/*** @author TAO* @description: 提供Swagger3 获取注册中心服务资源处理器* @date 2021/4/28 22:35*/@Slf4j
 @Primary
 @Component
 public class SwaggerProvider implements SwaggerResourcesProvider {private static final String API_URI = "/v3/api-docs";@Autowiredprivate SwaggerProperties swaggerProperties;@Autowiredprivate GatewayProperties gatewayProperties;@Overridepublic List get() {List resources = new ArrayList<>();Set dealed = new HashSet<>();// 记录已经添加过的servergatewayProperties.getRoutes().stream().filter(routeDefinition -> !swaggerProperties.getIgnoreProviders().contains(routeDefinition.getUri().getHost())).forEach(routeDefinition -> {String url = "/" + routeDefinition.getUri().getHost().toLowerCase() + "/" + routeDefinition.getId() + API_URI;// 拼接urlif (!dealed.contains(url)) {dealed.add(url);SwaggerResource swaggerResource = new SwaggerResource();swaggerResource.setUrl(url);///设置服务文档yy-user/v3/api-docsswaggerResource.setName(routeDefinition.getUri().getHost());//设置服务名yy-userswaggerResource.setSwaggerVersion("3.0");resources.add(swaggerResource);}});return resources;}
 }
4.编写配置文件
spring:cloud:gateway:discovery:locator:# 是否与服务发现组件进行结合,通过serviceId转发到具体服务实例enabled: true #是否开启基于服务发现的路由规则lower-case-service-id: true #是否将服务名称转换小写routes:- id: test_routeuri: https://www.baidu.compredicates: #断言如果请求路径中符合下面规则那么将请求交给uri中的服务处理- Query=url,baidu- id: auth #中央授权服uri: lb://yy-authpredicates:- Path=/auth/**filters:#5000/auth/oauth/token==>5000/oauth/token- RewritePath=/auth(?.*), ${segment}- id: user #APP端用户服务uri: lb://yy-userpredicates:- Path=/user/**filters:# 验证码处理- SmsValidateCodeGatewayFilter- id: admin #管理后台服务uri: lb://yy-adminpredicates:- Path=/admin/**- id: test #测试服uri: lb://yy-testpredicates:- Path=/test/**swagger:title: yy-gateway-apidescription: "网关服"version: 1.0license: "执照"licenseUrl: http://baidu.comterms-of-service-url: http://baidu.comcontact:name: taoemail: 111111url: http://baidu.comauthorization:name: http://baidu.comauth-regex: ^.*$authorization-scope-list:- scope: serverdescription: server alltoken-url-list:- http://${GATEWAY_HOST:yy-gateway}:${GATEWAY-PORT:5000}/auth/oauth/tokenignore-providers:- www.baidu.com- yy-auth- yy-gateway
5.启动测试

注意:
1
discovery:locator:# 是否与服务发现组件进行结合,通过serviceId转发到具体服务实例enabled: true #是否开启基于服务发现的路由规则lower-case-service-id: true #是否将服务名称转换小写
这段配置是一个比较核心的,在做聚合的时候其实这里用到了SpringCloudGateway通过服务名访问服务,在文章开通处有一个切换版本的地方,切换了一下
2
可能我们每个人搭建微服务的习惯不同,比如服务配置项目名,这个问题会导致我们访问请求是都会带上统一的项目名,那么这里在整合聚合文档的时候需要注意!
标签:
相关文章
-
无相关信息