Unity:Roll A Ball 学习笔记
一、创建项目、初始设置
1.1创建一个3D项目
1.2 在Assets文件夹下创建Scenes子文件夹用来保存游戏场景
创建一个游戏场景,命名为MiniGame,记得保存游戏项目。

1.3 创建游戏平面(Creat->3D Object->Plane)
将其重命名为Ground;将position设置为0,0,0。或者右上角选择重置,会将该游戏对象放置在场景0,0,0处。
改变平面的大小,可以直接沿坐标方向拉伸,也可以Transform中的Scale设置,这里将其设置成2,1,2


1.4 创建球体(Creat->3D Object->Sphere)
重命名为Player,重置位置,确保他在原点。但会发现球被埋在下面一点,所以将球上移,y=0.5

1.5 给场地和小球设置颜色:
在Assets文件夹下创建Materials子文件夹用来保存材质属性
创建材质(creat->Material),将其重命名为Background(要放在上面的文件夹下),设置颜色。单击文件夹中的素材,将其拖到场景上。
同样的方法创建另一个材质,命名为Player,选择颜色,拖拽到小球上。


二、移动小球
2.1 给小球对象添加刚体(rigidbody)属性关联游戏对象。
先选中小球对象,选择下方的添加组件(Add Component),选择rigidbody,会出现:

2.2 在Assets文件夹下创建Scripts子文件夹用来保存代码脚本
选中小球对象,添加组件,选择scripts,命名为PlayerController。
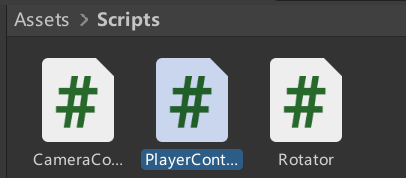

2.3 编辑PlayerController脚本
双击打开脚本文件(要用vs打开,且vs需要安装unity相关组件,否则没办法使用unity库) 编写代码,一下代码可以实现小球移动和跳跃。
using System.Collections;
 using System.Collections.Generic;
 using UnityEngine;
 using UnityEngine.UI;public class PlayerController : MonoBehaviour
 {public float speed;public Text countText;private Rigidbody rb;// Start is called before the first frame updatevoid Start(){rb = GetComponent();}// Update is called once per framevoid FixedUpdate(){float moveHorizontal = Input.GetAxis("Horizontal");float moveVertical = Input.GetAxis("Vertical");bool moveUp = Input.GetKey("space");Vector3 pos = rb.transform.position;bool ground = false;if (pos.y <= 0.5f) ground = true;Vector3 movement = new Vector3(moveHorizontal, 0.0f, moveVertical);if (ground && moveUp){movement = new Vector3(moveHorizontal, 120.0f, moveVertical);}rb.AddForce(movement * speed);}
 }
可以在界面设置小球的速度。我将其设置为8,太小的话小球反应很慢。

这时,进入游戏模式小球已经可以移动和跳跃了。
三、移动摄像机
3.1 设置相机参数

3.2 编写脚本让摄像机跟随小球移动
点击摄像机,添加组件scripts,命名为CameraController
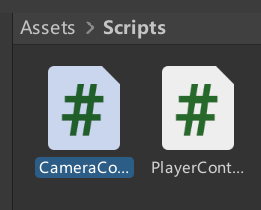
脚本:
using System.Collections;
 using System.Collections.Generic;
 using UnityEngine;public class CameraController : MonoBehaviour
 {public GameObject player;private Vector3 offset;// Start is called before the first frame updatevoid Start(){offset = transform.position - player.transform.position;}// Update is called once per framevoid LateUpdate(){transform.position = player.transform.position + offset;}
 }
3.3 将小球对象拖到以下位置与摄像机绑定:
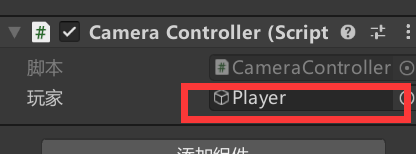
四、设置游戏场地
4.1 设置游戏边界
创建游戏对象命名为Walls,作为所有墙体的父对象
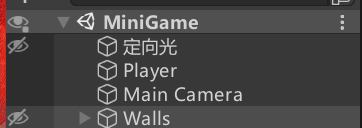
4.2 创建一个新的游戏对象(3D Object->Cube),命名为West Wall, 并将他拉到Walls对象下,作为它的子对象。

4.3 设置West Wall的位置和大小:
 效果:
效果:

4.4 同理,复制West Wall创建出East Wal、North Wall、South Wall,同样将其放在Walls下作为它的子对象
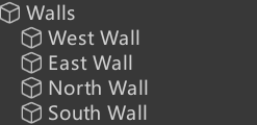
4.5 设置其他三个墙的参数,使其将场地围成封闭空间


效果:

五、创建收集物
5.1 创建新的游戏对象(3D Object->Cube),命名为Pick Up, 设置它的大小,位置,以及倾斜程度;

效果:
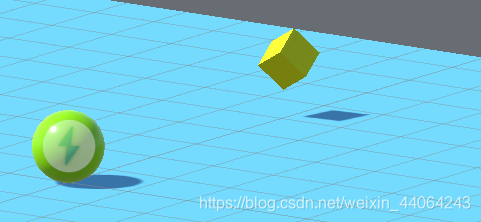
5.2 编写脚本让收集物旋转起来
选中收集物,添加Scripts组件,命名为Rotator,放到文件夹下:
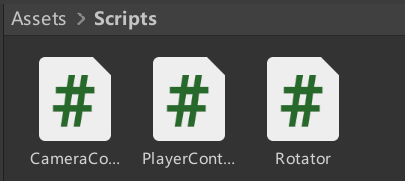
脚本:
using System.Collections;
 using System.Collections.Generic;
 using UnityEngine;public class Rotator : MonoBehaviour
 {// Update is called once per framevoid Update(){transform.Rotate(new Vector3(15, 30, 45) * Time.deltaTime);}
 }
5.3 将PickUp设置为预设
在Assets文件夹下创建Prefabs文件夹,将Hierarchy视图下的PickUp拖到文件夹中,此时就创建了一个预设资源:
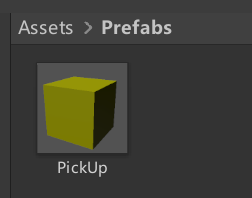
5.4 创建一个空的游戏对象的承载Pick Up对象,将其命名为Pick Ups:
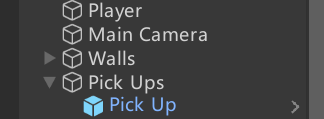
5.5 更换成顶部和全局视角:放大后方便放置其他的收集物

5.6 复制Pick Up,创建和摆放其他的收集物

效果:

5.7 为收集物创建颜色
新建Materials,命名为Pick up将其拖到小方块上,为收集物设置颜色。将Materials文件夹中的Pick Up直接拖到Prefabs中的Pick Up上,直接处理预设,所有小方块都变色。

六、收集物品
6.1 重新补充编写PlayerControlle的脚本,新增碰撞器方法
    void OnTriggerEnter(Collider other){if (other.gameObject.CompareTag("Pick Up")){other.gameObject.SetActive(false);count = count + 1;SetCountText();}
 }
6.2 为Pick Up设置tag:
选择Pick Up的预设资源,在标签出下拉选择add tag,点击+,取名为Pick Up

选择标签Pick Up:

设置完这些后,小球可以对小方块有了碰撞的效果,但是不会收集而是会反弹。
6.3 设置方块的碰撞触发器
选中预设PickUp,勾选:

此时,小球与方块碰撞之后,方块就会消失,呈现出拾起的效果。
6.4 为PickUp预设添加刚体组件并设置属性,让方块变成动态碰撞器,优化效果。

七、显示分数和文本
7.1 完善PlayerController脚本
新增展示分数和文本的方法:
using System.Collections;
 using System.Collections.Generic;
 using UnityEngine;
 using UnityEngine.UI;public class PlayerController : MonoBehaviour
 {public float speed;public Text countText;public Text winText;private Rigidbody rb;private int count;// Start is called before the first frame updatevoid Start(){rb = GetComponent();count = 0;SetCountText();winText.text = "";}// Update is called once per framevoid FixedUpdate(){float moveHorizontal = Input.GetAxis("Horizontal");float moveVertical = Input.GetAxis("Vertical");bool moveUp = Input.GetKey("space");Vector3 pos = rb.transform.position;bool ground = false;if (pos.y <= 0.5f) ground = true;Vector3 movement = new Vector3(moveHorizontal, 0.0f, moveVertical);if (ground && moveUp){movement = new Vector3(moveHorizontal, 120.0f, moveVertical);}rb.AddForce(movement * speed);}void OnTriggerEnter(Collider other){if (other.gameObject.CompareTag("Pick Up")){other.gameObject.SetActive(false);count = count + 1;SetCountText();}}void SetCountText(){countText.text = "Count:" + count.ToString();if (count >= 12){winText.text = "You Win!";}}
 }
7.2 创建UI显示文本
Create->UI->Text,命名为Count Text,再创建一个Win Text

设置文本的大小,颜色,字体:


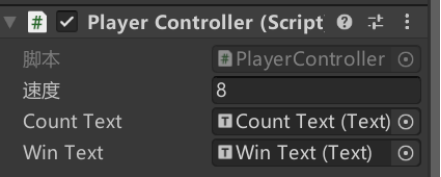
7.3 在playerController中绑定文本:将文本拉入。
效果:

八、编译游戏:
8.1 创建_Build文件夹(自定义)存放生成文件
8.2 生成游戏文件
file->Build Settings

8.3 程序生成

九、直接在unity外中运行
点击运用程序打开游戏:

收集完小方块:

标签:
相关文章
-
无相关信息
